QR Factory 3
Using the Command Line Interface (CLI) to create QR codes
QR Factory 3 is a complete solution for generating QR codes, either individually or in batches. It is available for both macOS and iPadOS on the respective App Stores.
There's no cost to download it and has a one week trial to try everything out for free. All codes are generated on-device and belong to the user with no re-directing to ads or interference. To learn more about the handy features and professional options, see the homepage for QR Factory 3. It can generate an unlimited number of QR codes in one batch. This can be three codes, ten codes, one hundred codes, or even 10,000 codes. All at once, with optional verification and/or saving to templates for printing to Avery or DYMO labels.
In addition, it can now be launched via the Command Line Interface (CLI) to generate single or multiple QR codes. All the features and options within the normal interface are available through command line options and flags. The following documents how to build up the arguments to fit almost any workflow that requires generating QR codes using a command line tool.
Note: This only applies to the macOS version since there is no available command line in iPadOS.

Requires macOS 12 or iPadOS 15
Supported macOS versions:
macOS 12 Monterey - macOS 15 Sequoia
Supported iPadOS versions:
iPadOS 15 and up
Latest Version:
QR Factory 3.4.5
Release Date:
March 11, 2025
Pricing (USD):
Subscription: $14.99/year or $4.99/3 months, with either including a free 7-day trial.
Lifetime Access: $29.99 one time purchase.
Getting Ready
Before generating any QR codes, there are a couple of items that must be setup first. The first is to choose the folders where any generated QR codes will be stored, and optionally where the CSV file for generating multiple QR codes is located. This is due to macOS restricting apps from accessing files and folders unless the user has explicitly given access.
The second is to ensure that either a valid subscription is available (this includes the trial period) or the lifetime access option has been purchased.
Setup access to the folders
The first item to setup is to open QR Factory, click the application menu and then choose "Preferences…". Once that opens, choose the Command Line Interface tab, and it will have two buttons to choose the folders.
Choose the output folder for where the QR codes will be stored, and optionally where the CSV files will be located if multiple codes will be created.
The reason it is necessary to choose the folders now is because QR Factory 3 runs inside its own sandbox, which is a security feature of macOS (and iOS as well). Applications running inside a sandbox cannot access any files or folders in the file system without the user first giving explicit permission, for example by choosing a folder using the open dialog.
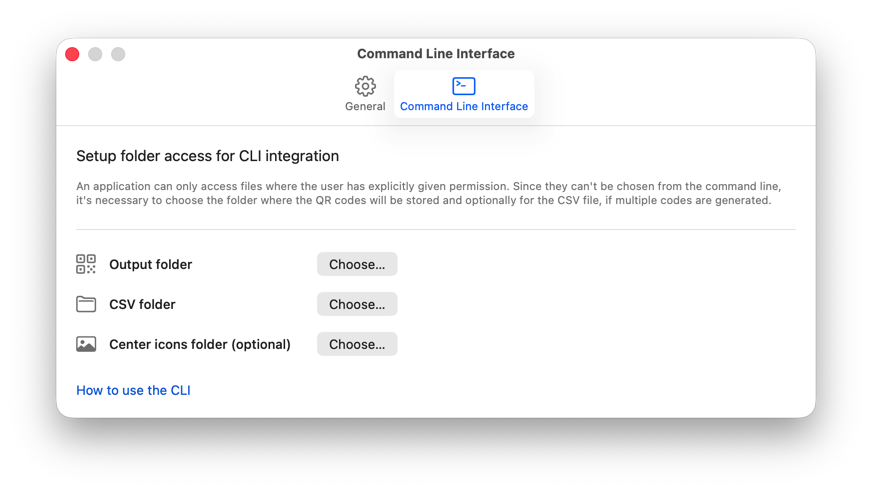
Before choosing the folders

After choosing the folders
Purchase a license
For the purpose of this explanation, a license refers to either a subscription or the one-time payment for lifetime access.
This step is only required if none of the following are true:
- A subscription is in the trial period
- A subscription has been purchased and has not expired
- The lifetime access option has been purchased
- QR Factory 3 - Enterprise Edition is being used, which is a one-time payment with no in-app purchases.
Once a license is purchased, or a subscription started in the trial period for new users, all the app features including the CLI mode will become available.
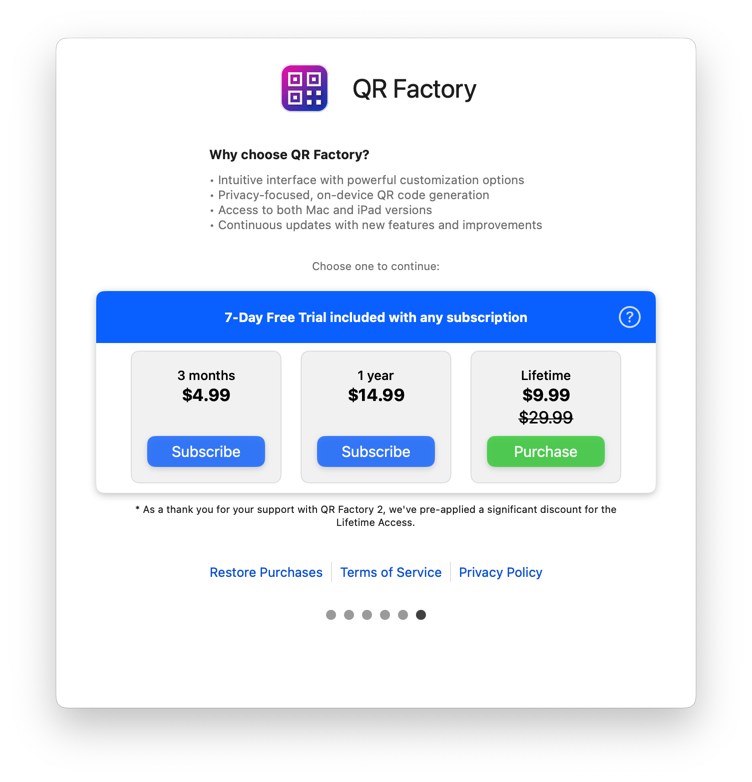
Purchase options (example in US dollars)
Launch QR Factory from the command line
To generate QR codes using the command line, any terminal can be used. macOS comes with the default Terminal application which can be launched from the /Applications/Utilities folder, or from Launchpad.
The way macOS applications are structured, they are actually a special type of folder called a bundle. These bundles contain all the files necessary to run the application including icons/images displayed, 3rd party libraries, localizations, etc, as well as the actual executable file. The executable file in this case for QR Factory would be located at:
/Applications/QR\ Factory.app/Contents/MacOS/QR\ Factory
This is the path to the executable that will be used in the examples. It is possible that it could be different, although only if QR Factory has been moved to another folder.
Note: Any path used in the command line that contains spaces must have them escaped. This is why the spaces have a backslash in front of them.
To launch QR Factory in the CLI mode, there are a specific flag that must be used, otherwise it will open as a regular desktop application. The flag is "--cli-mode" without the quotes. This is required, although it only tells QR Factory to launch as a command line executable, and more input is required in order to actually generate a QR code, which will be shown in the next sections.
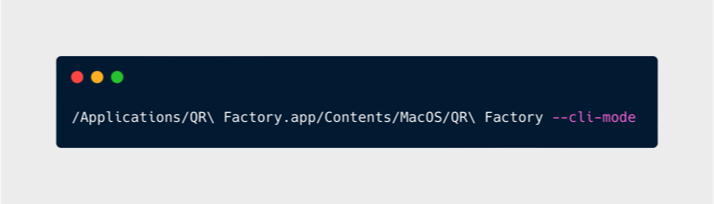
Launching QR Factory in CLI mode
Create single QR code
To create a single QR code, there are three elements that must be provided to the command line arguments so QR Factory knows what to make and where to put it.
There is the type to create, the content to encode, and where to store the generated code. The following sections explain each element in detail, and build upon the previous one.
Set the type
The first piece of information that must be added is the type of QR code to create. Just like most of the options, there are long and short versions that can be used. After the type, the content is specified inside of quotes. How to structure the different types of content is detailed in the next sections. Here's how to start by adding the type:
--code-type [type] "content for this type"
or
-t [type] "content for this type"
With [type] being replaced with one of:
text
url
email
location
dialer
sms
person
wifi
calendar
social
sepa
crypto
Note: If the content text will have an exclamation mark, it must be escaped by included a backslash in front of it. Otherwise the exclamation mark will be interpreted by the terminal to execute a previous command.
For example: --code-type text "Hello world\!"
Note: If the content text contains quotes, they must be escaped with a backslash.
For example: --code-type text "The person said his name was \"Bob\", but we're not sure."
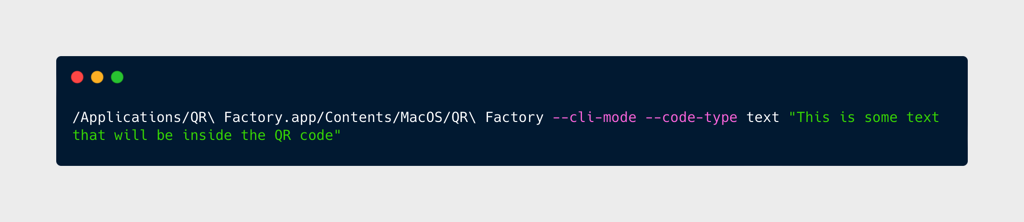
Setting the QR code type to text plus the content
Text & URL
For both the "text" and "url" code types, they are different from the others in that they will accept the content as one quoted string. The other types require structured data because of the multiple data parameters, whereas these are just one value.
Here are examples for both types:
--code-type text "This is some text that will be inside the QR code"
--code-type url "https://www.tunabellysoftware.com"
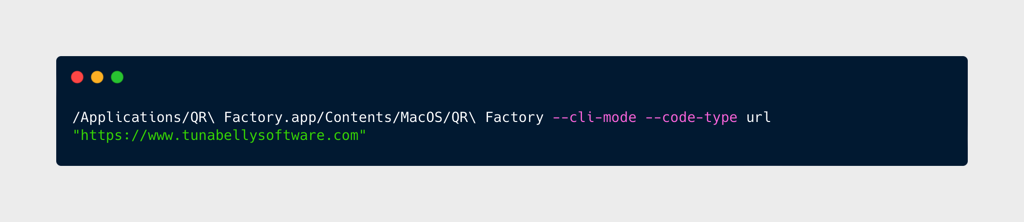
Setting the QR code type to url along with the website
All other types
For all the types, excluding "text" and "url", they require the content to be passed as structured data. The way it works is using key-value pairs separated by semicolons.
The format is "key=value;key=value;key=value" and so on until they have all been specified, with no trailing semicolon.
It uses the same key-value pairs that would be used inside a CSV file, which is used for generating multiple codes. The full list of pairs for each type is available in the QR Factory 3 CSV format page. Here are a few examples:
Email:
--code-type email "email=support@tunabelly.com;subject=I have a question about QR Factory;body=Which types of QR codes can it create?"
Person:
--code-type person "FirstName=John;LastName=Doe;NameTitle=Mr;Nickname=OToro;Company=Tunabelly Software;JobTitle=CEO;JobDepartment=Engineering;PhoneHome=9054031234;PhoneWork=6045601000;PhoneMobile=4169901000;EmailHome=home@example.com;EmailWork=work@example.com;StreetHome=1 Wellington St;CityHome=Toronto;ProvinceStateHome=Ontario;CountryHome=Canada;PostalZipCodeHome=K1A0A9;StreetWork=1 Infinite Loop;CityWork=Cupertino;ProvinceStateWork=California;CountryWork=USA;PostalZipCodeWork=95014;URL=https://www.tunabelly.com;Note=This is a general note that can contain anything that should be included for this contact."
Calendar (notice the backslash before the exclamation mark to properly escape it):
--code-type calendar "Title=My Calendar Event;Description=My amazing calendar event\!;Location=Downtown;StartDate=2023-08-01T06:00;EndDate=2023-08-01T23:05;TimeZone=America/Vancouver"
SMS:
--code-type sms "number="+16044012300";message=This is a text built using a QR code."
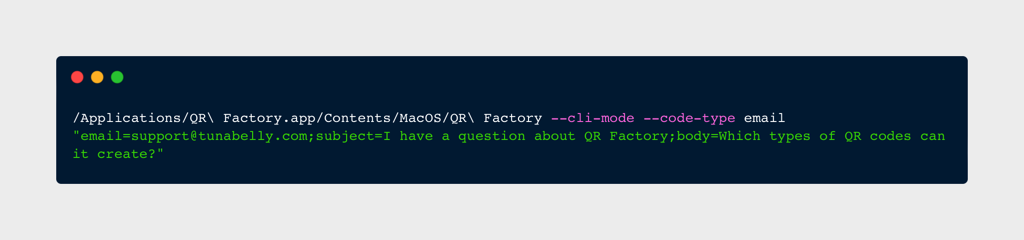
Setting the QR code type to email plus the content
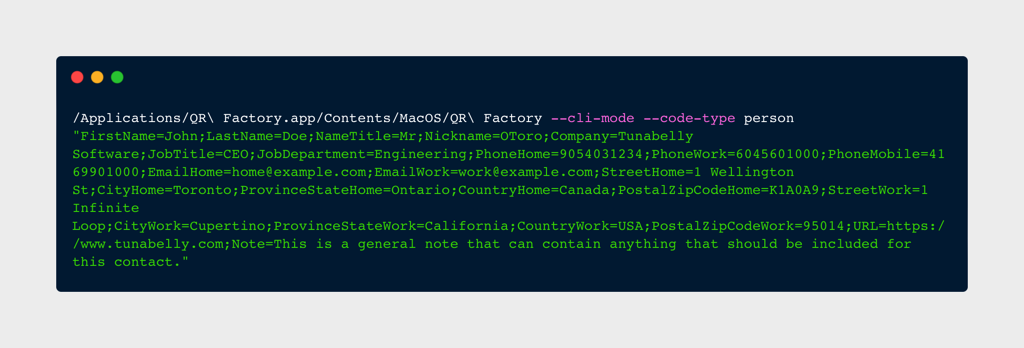
Setting the QR code type to person with all their information
Set output location
The last item that's required is the output location, which will be a fully qualified path include the filename and extension. This is where QR Factory will store the file, or files in the case of multiple files being made.
Recall that at the beginning, the output folder was chosen inside the QR Factory preferences. This is what gives the command line version access without having to prompt for it. Once this is added to the command and run, the QR code will be generated and saved.
Here's how to set it:
--output-path [fully qualified path to the filename with extension]
or
-o [fully qualified path to the filename with extension]
For example, if the output folder chosen was the Desktop, then this would work:
--output-path "/Users/macuser/Desktop/New QR code.png"
Notes:
- By default, the generated QR codes are in PNG format, which can be adjusted using the appearance options.
- If there is a space in the path, it must be inside quotes.
- It must be located inside the output folder that was chosen in QR Factory, or an error will returned with instructions on how to resolve it.
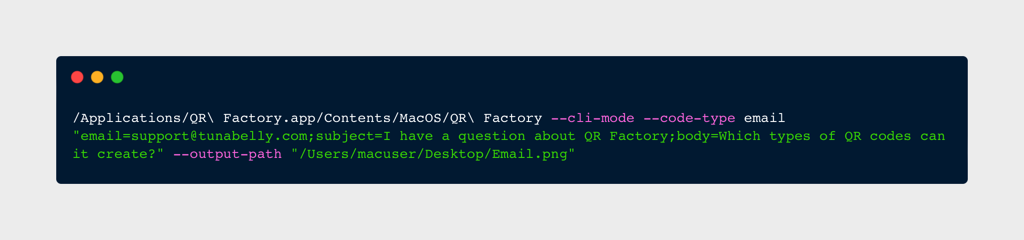
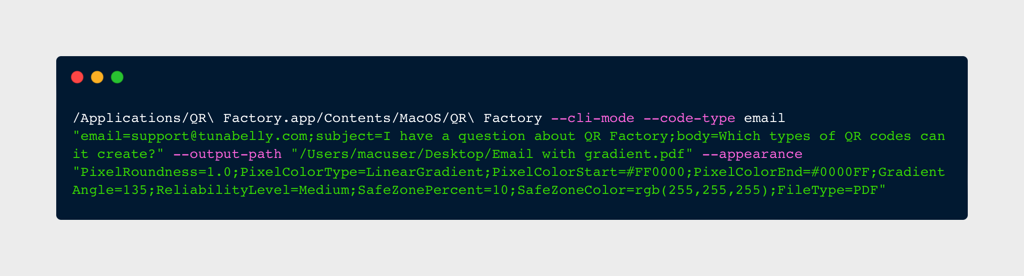
Setting all options to save an email QR code
Set appearance options
One of the greatest features of QR Factory is the ability to customize the appearance of the QR codes. All of the options that are available when launched normally can also be used in the command line.
The way it works is similar to how the structured data is passed for certain QR code types. The format is key=value;key=value;key=value and so on until they have all been specified, with no trailing semicolon.
It uses the same key-value pairs that would be used inside a CSV file, which is used for generating multiple codes. The full list of pairs for each type is available in the QR Factory 3 CSV format page.
Here's how to use it:
--appearance ["key-value pairs"]
or
-a ["key-value pairs"]
For example, this will create a QR code with rounded pixels, a linear gradient, medium reliability level, a safe zone around it and in PDF format:
--appearance "PixelRoundness=1.0;PixelColorType=LinearGradient;PixelColorStart=#FF0000;PixelColorEnd=#0000FF;GradientAngle=135;ReliabilityLevel=Medium;SafeZonePercent=10;SafeZoneColor=rgb(255,255,255);FileType=PDF"
For specifying colors, there are three different formats that can be used:
- Web (also known as hex) written as #RRGGBB where RR, GG and BB are the hex values for each color channel.
- RGB, written as rgb(R,G,B), where R, G and B are between 0-255.
- CMYK, written as cmyk(C,Y,M,K) where C, Y, M and K are between 0-100.
Adding in options to change the QR code appearance and format
Multiple QR codes
Another incredibly useful feature of QR Factory 3 is the ability to generate multiple QR codes in one batch by using Comma Separated Values (CSV) files. To make multiple QR codes, there are two items that need to be set: the path to the CSV file and the path to the output folder where they will be saved. Optionally, flags to save the verification results and/or output for label printing can be set. Here's how:
--csv [fully qualified path to the CSV file] --output-path [fully qualified path to the filename with extension]
or
-c [fully qualified path to the CSV file] -o [fully qualified path to the filename with extension]
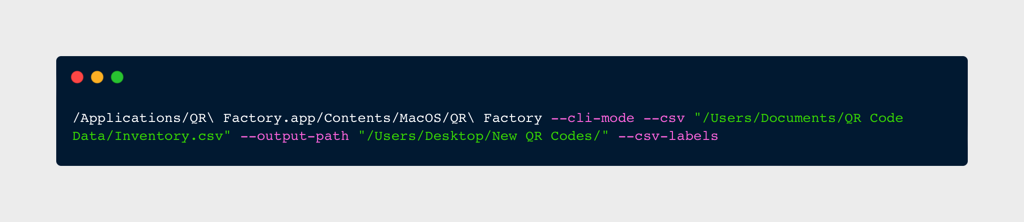
A full example with both would look like this:
--csv "/Users/Documents/QR Code Data/Inventory.csv" --output-path "/Users/Desktop/New QR Codes/"
Notes:
- If there is a space in either path, they must be inside quotes.
- Both paths must be located inside their respective CSV file folder and output folder that were chosen in QR Factory, or an error will returned with instructions on how to resolve it.
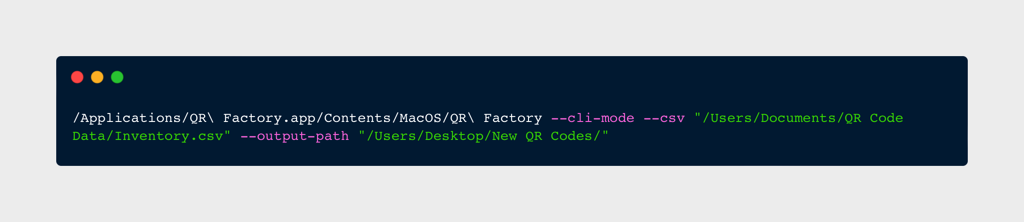
Using a CSV file to generate multiple QR codes
Verification results
One of the options available when generating multiple QR codes is to have each one verified for readability and the results compiled into a PDF. The PDF file will be saved in the same folder as the QR code. To enable this option on the command line, use the following:
--csv-verify
or
-v
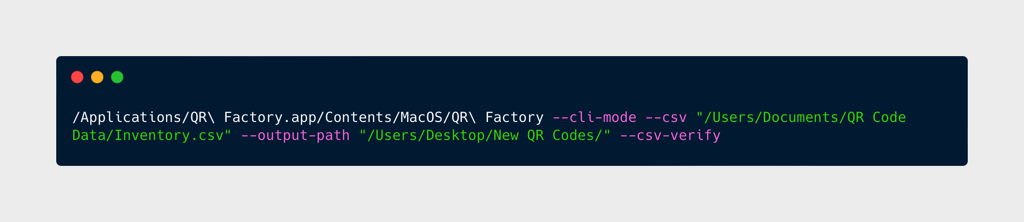
Verifying each QR code with the results in a PDF file
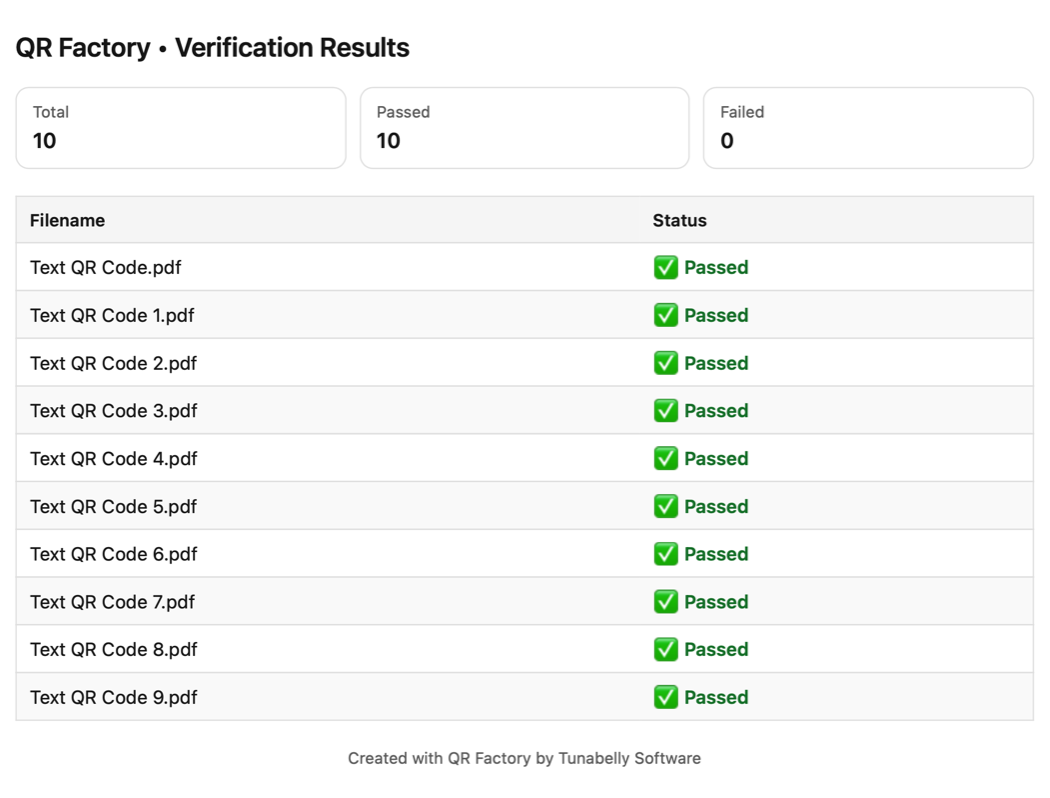
Example of verification PDF
Printing for labels
Other option available when used in combination with generating multiple QR codes, is to have them laid out for easy printing to Avery labels. This option combines the QR codes into a single PDF. It will use the label type, model, and padding percentage that were last set inside the app.
--csv-labels
or
-l
Outputting multiple QR codes for printing to labels
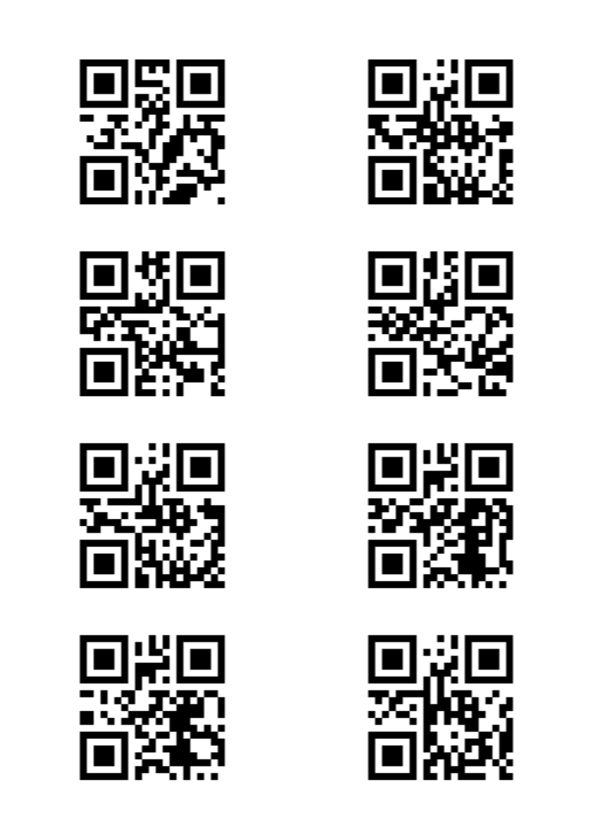
PDF of QR codes laid out for printing to labels
Streaming data using STDIN and STDOUT
QR Factory supports using both the STDIN and STDOUT steams to input data and redirect a generated QR code to a file or process.
If the --output-path is not set, then by default the data for the QR code will be streamed to STDOUT. This allows the opportunity to send the data to another command, utility or pipe.
For example, to redirect to a file:
--code-type url "https://www.tunabellysoftware.com" >> /Users/macuser/Desktop/url.png
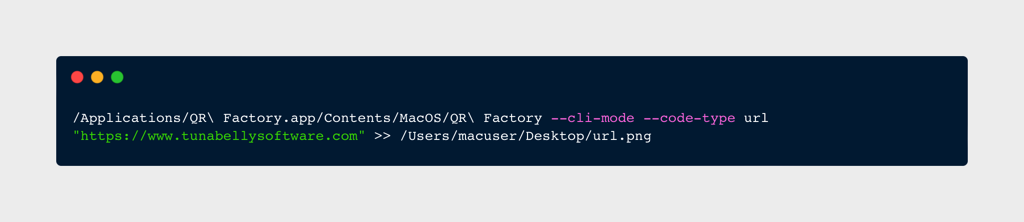
Redirecting the file data to a file
It is also possible to pipe the content for a QR code to create via the STDIN stream. In this case, an extra flag is required that tells QR Factory to read the contents using STDIN instead of looking for them when it was launched.
--read-input
In this example, it actually uses both streams so that all the input values and generated QR code are only in memory:
echo "\"email=support@tunabelly.com;subject=Hello World;body=This is a test\"" | ./QR\ Factory --cli-mode --read-input -t email >> "/Users/macuser/Desktop/Email.png"

Using both streams for content and redirecting
Exit error codes
QR Factory will return the following exit codes:
0 : No error, with all QR codes generated successfully
1 : There was an error generating the QR code (it will also be printed to STDOUT)
-2 : There is no valid subscription or lifetime access
-3 : The folder where the CSV files are located was not chosen inside the app
-4 : The output folder where it will store the generated QR codes was not chosen inside the app
-5 : The CSV file is not within the chosen folder
-6 : The output folder used it not within the chosen folder
QR Factory
Purchase options in Canadian dollars